To kick things off, let’s take a look at the Video How-To followed by our standard Step-by-Step.
Option 1 – Change The Style to Office 2003
The first way to change the default line spacing is to make the Word 2003 style your default. To do this, Click Change Styles, then Click Style Set and Check Word 2003. You can go ahead and type in a few words to see if this style fits your needs.
If you want to set the Word 2003 style as a default for every new document, simply Click Change Styles again and then Press the Set as Default button. I wouldn’t fully recommend this method since it changes the entire layout to be like a document made in Word 2003 and you may not want this but hey, perhaps that’s exactly what you want!
Option 2 – Change The Line Spacing Options Only
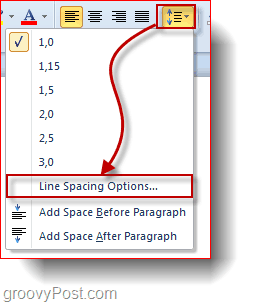
This is the method I would probably recommend. Click the Line and Paragraph Spacing button and then Click Line Spacing Options.
Now find the Spacing section of the Paragraph window and Change the value from “At:” to 1,00.
Then just Click Set as Default below and you’re done.
Comment Name * Email *
Δ Save my name and email and send me emails as new comments are made to this post.


![]()
