Set Up Touch ID for iPhone or iPad
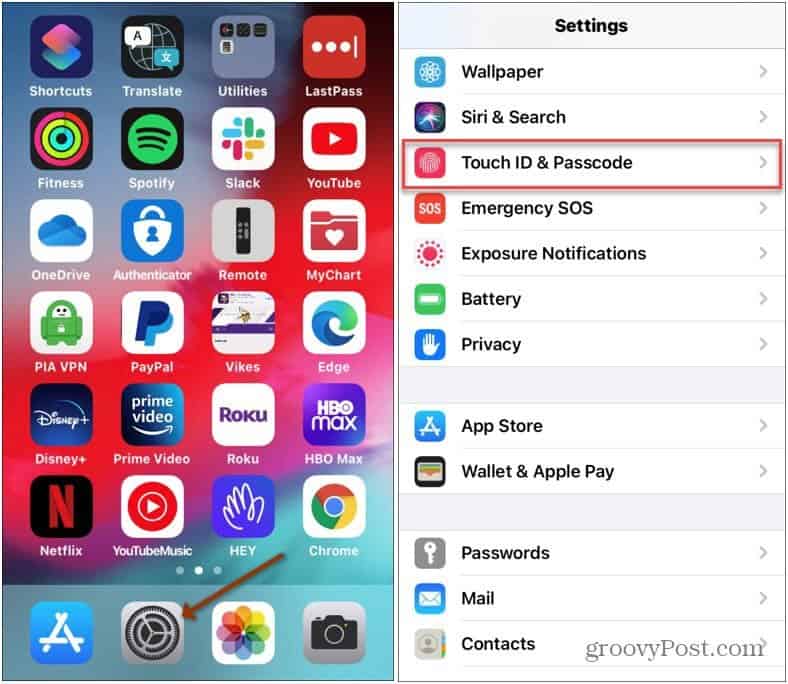
Tap Settings and then scroll down and tap Touch ID & Passcode.
Being that you’re changing the security settings on your device, Apple wants to make sure it’s you. Type in your passcode when prompted.
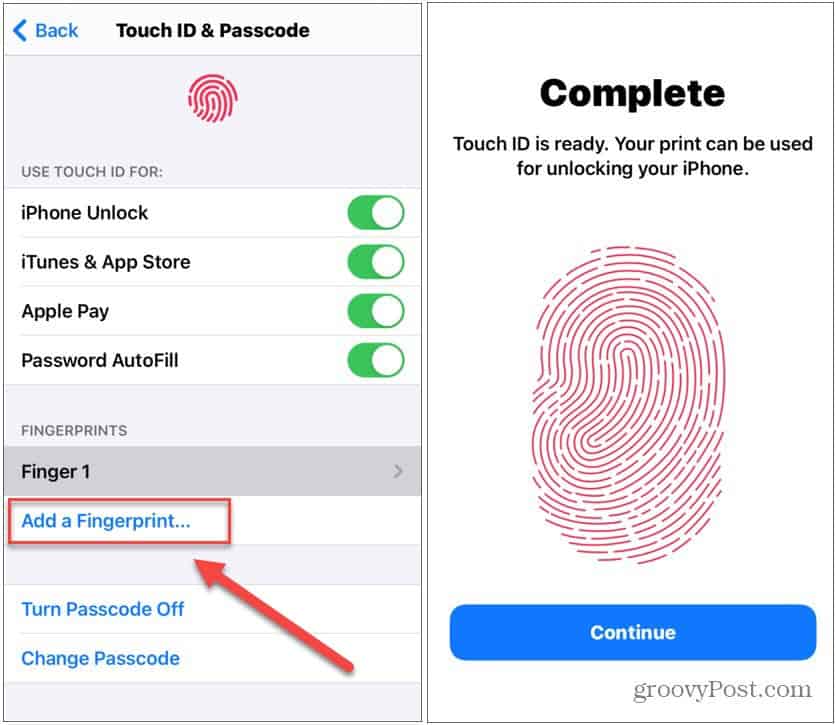
After typing in your passcode tap Add a Fingerprint. Then your phone will prompt you to place your finger on the Home button several times. Your iPhone or iPad will capture all aspects of your fingerprint. Progress is displayed by filling out a fingerprint on your screen. Follow the prompts until the full scan is complete. Note: Although the device will prompt you to lift your finger, each time your print is read, your device will vibrate. Lift your finger and place it again when prompted. When it’s complete tap the Continue button.
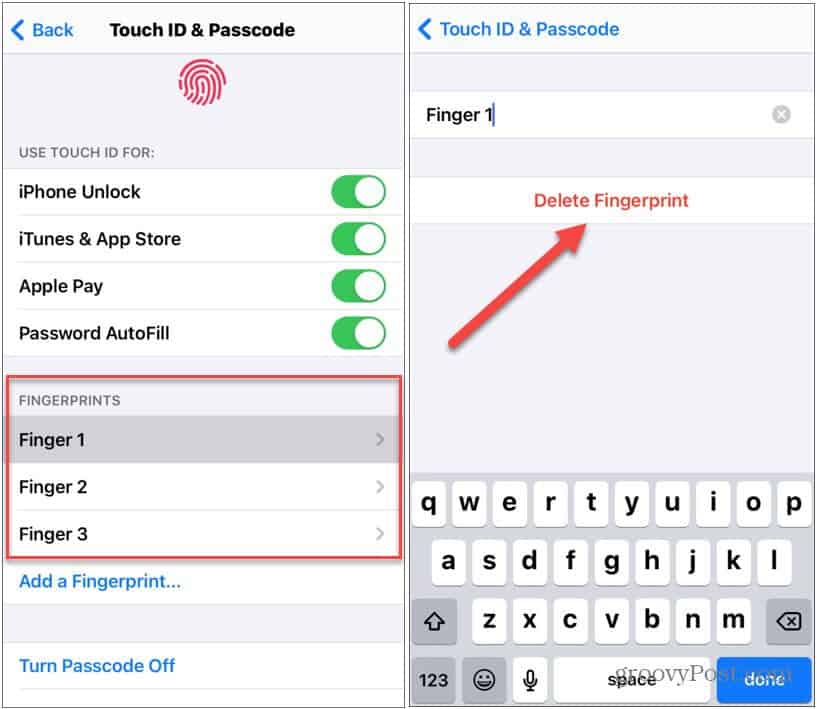
Note: After using my iPhone for a few days, I found my index finger and my two thumbprints are the handiest to have on file. My wife added one of her fingers as well for easy access to my iPad. When completed, your new fingerprint will be listed as Finger 1, Finger 2, etc. If you ever want to remove a fingerprint, simply tap the one you want to remove. Then tap the Delete Fingerprint button. It’s also worth noting that you can change the name of your fingerprint from this screen, too.
A nice side benefit of unlocking your iOS device with Touch ID is your kids can no longer spy on you while you’re unlocking it with a passcode. And if you have a newer device, check out our article on how to use Face ID to unlock your iPhone.
- iPhone 5S * iPhone 6 * iPhone 6 Plus * iPad Air 2 * iPad Mini 3 * Future iPhones and iPads (obviously) So if you have a device earlier than the list below, unfortunately your device won’t support it… -S I can give all my 5 fingers of one hand in just one fingerprint and can unlock with any of my finger. Shouldn’t it be just one finger per fingerprint? Thanks Comment Name * Email *
Δ Save my name and email and send me emails as new comments are made to this post.
![]()


