Getting the Perfect Screenshot
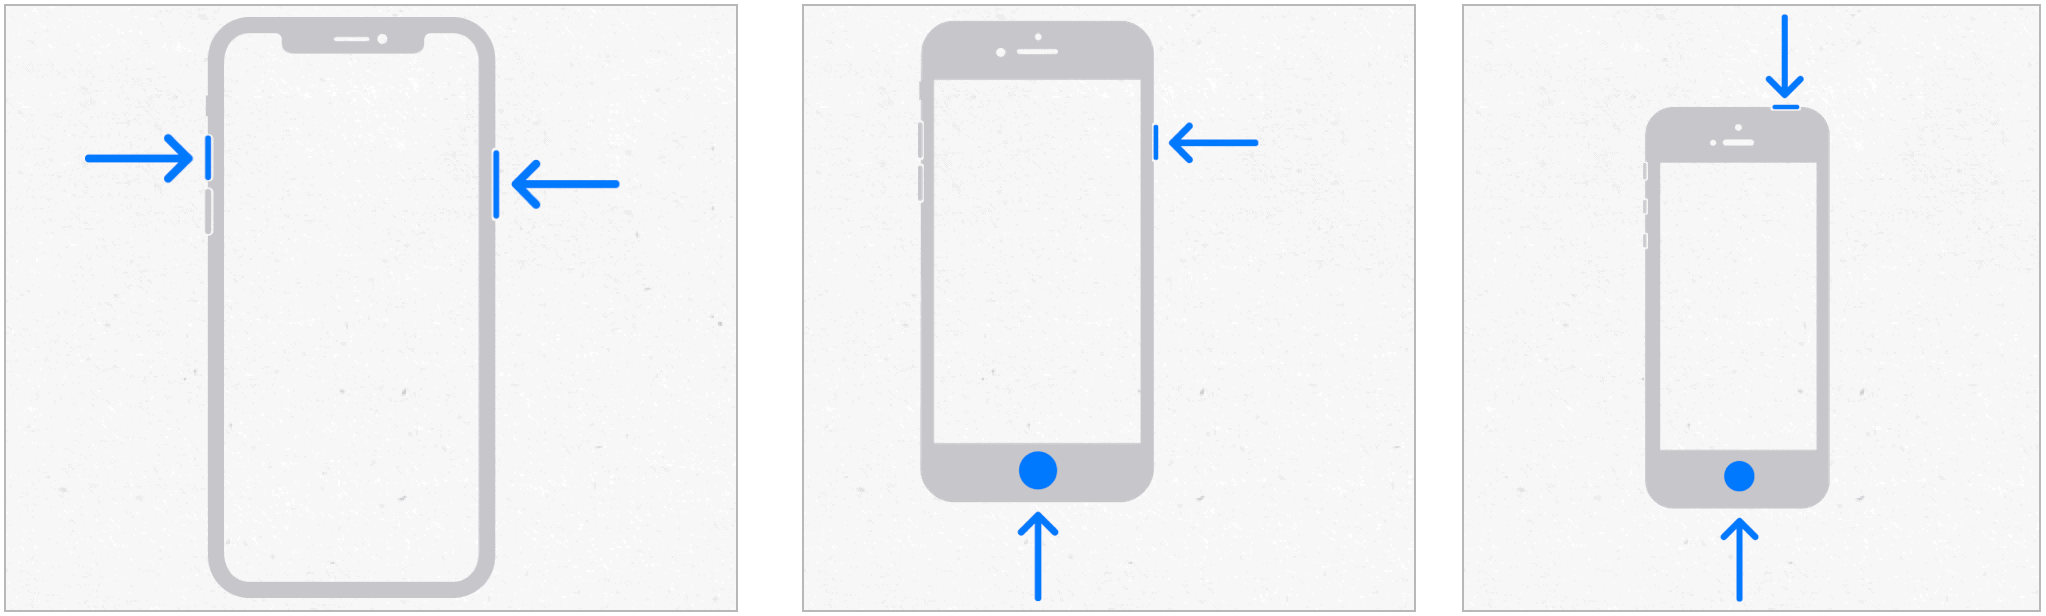
Before getting started with Markup, it’s essential to know how to take screenshots on your mobile devices. The steps are slightly different, depending on the iPhone model.
Face ID
On late-generation iPhones that use Face ID, you create screenshots by following these directions: After you take a screenshot, you’ll see a thumbnail representing it temporarily at the bottom left of the display. Tap the thumbnail to open it or swipe left to dismiss it. The latter sends it automatically to your photos library.
Touch ID
To take screenshots on Touch ID-enabled iPhones with a side button: To take screenshots on Touch ID-enabled iPhones with a top button, including the iPod touch: In both cases, tap the screenshot thumbnail to open it or swipe left to dismiss it.
Time for Markup
You can Markup various types of files, including images, documents, and PDFs. Here’s how to do it, according to the app.
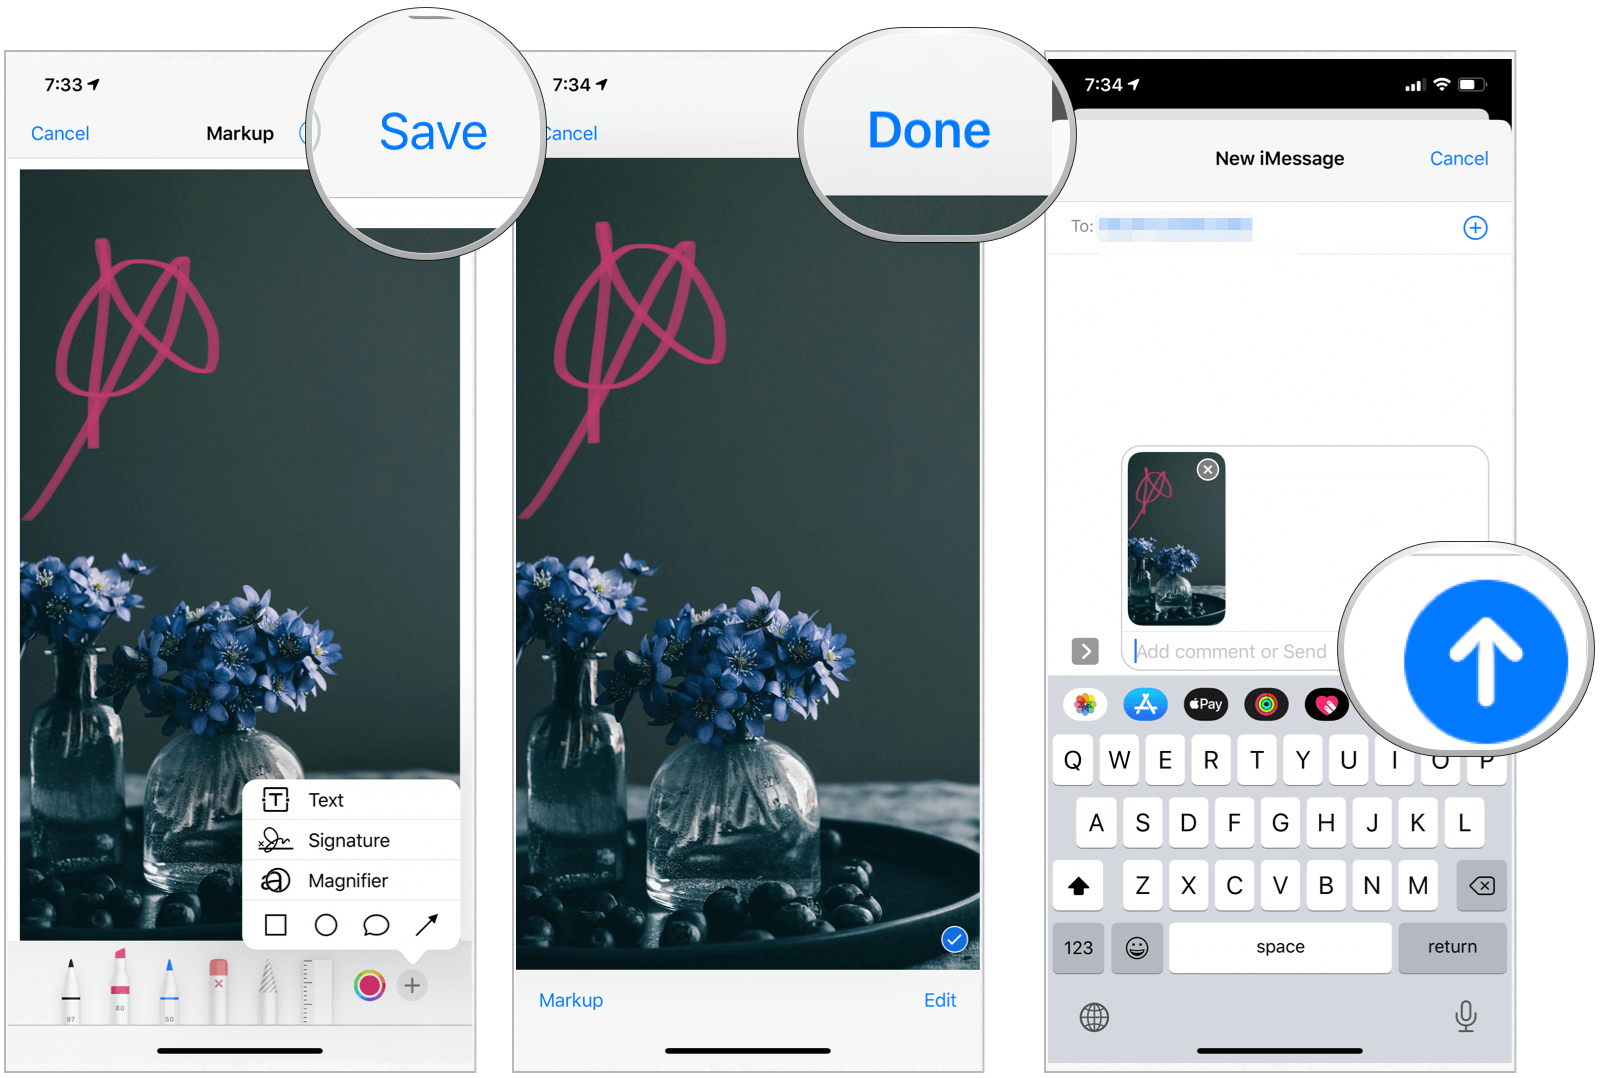
Messages App
To use Markup in the Apple Messages app:
Next:
Photos App
To use Markup in the Photos app on your iPhone or iPad:
From there:
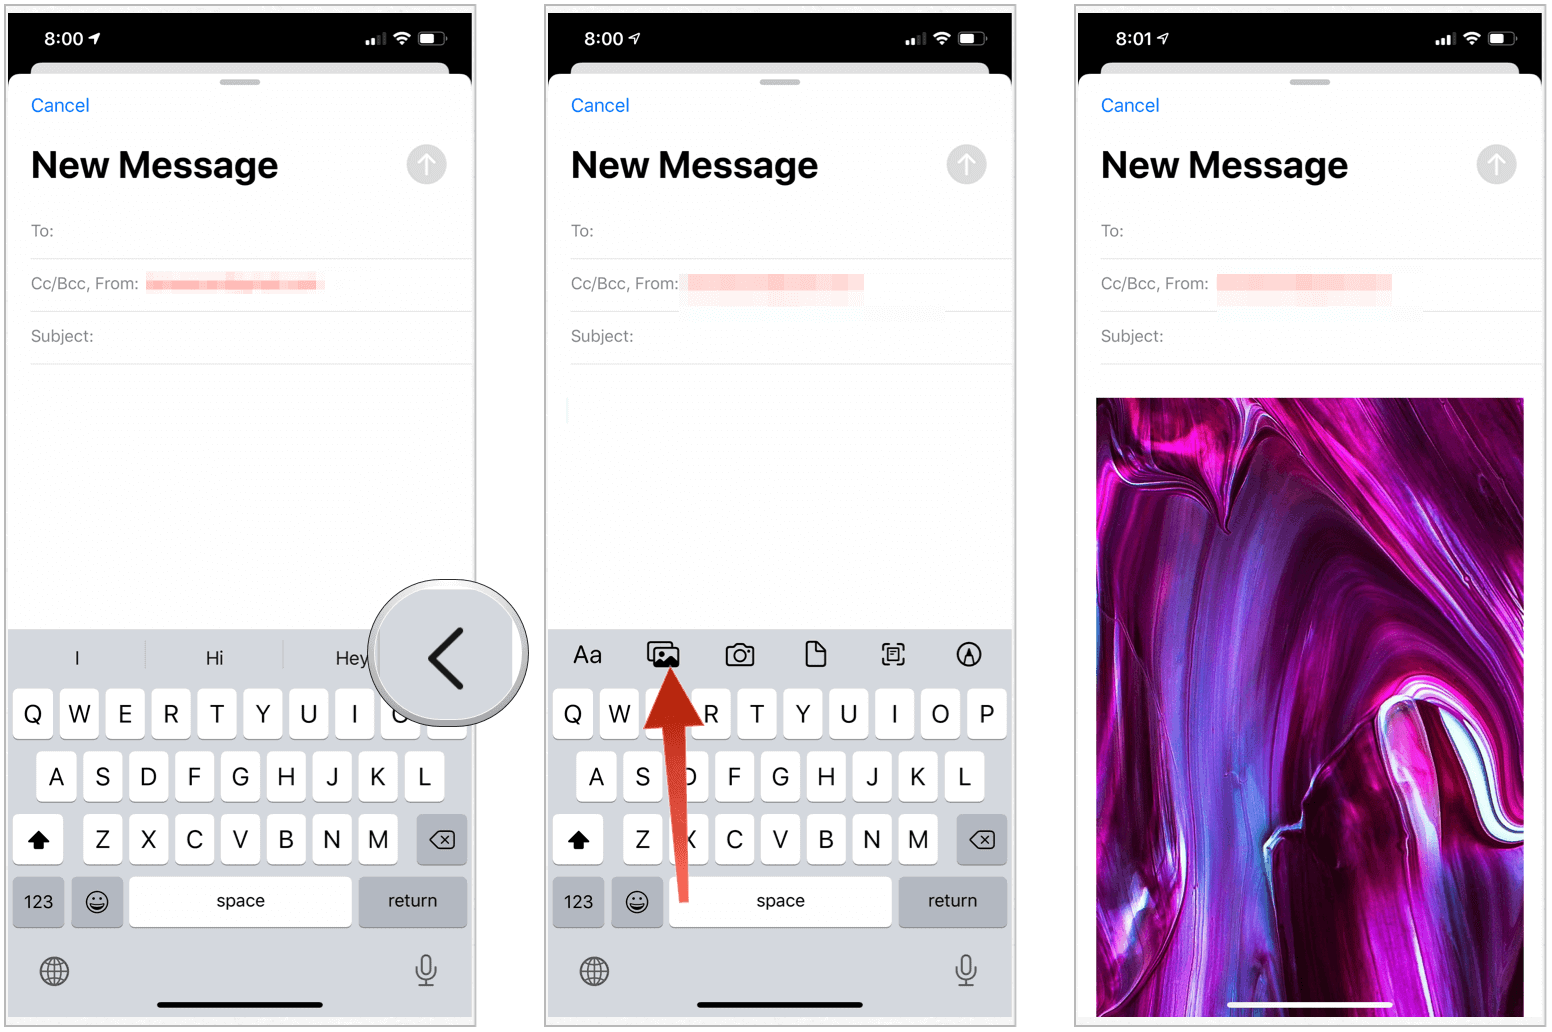
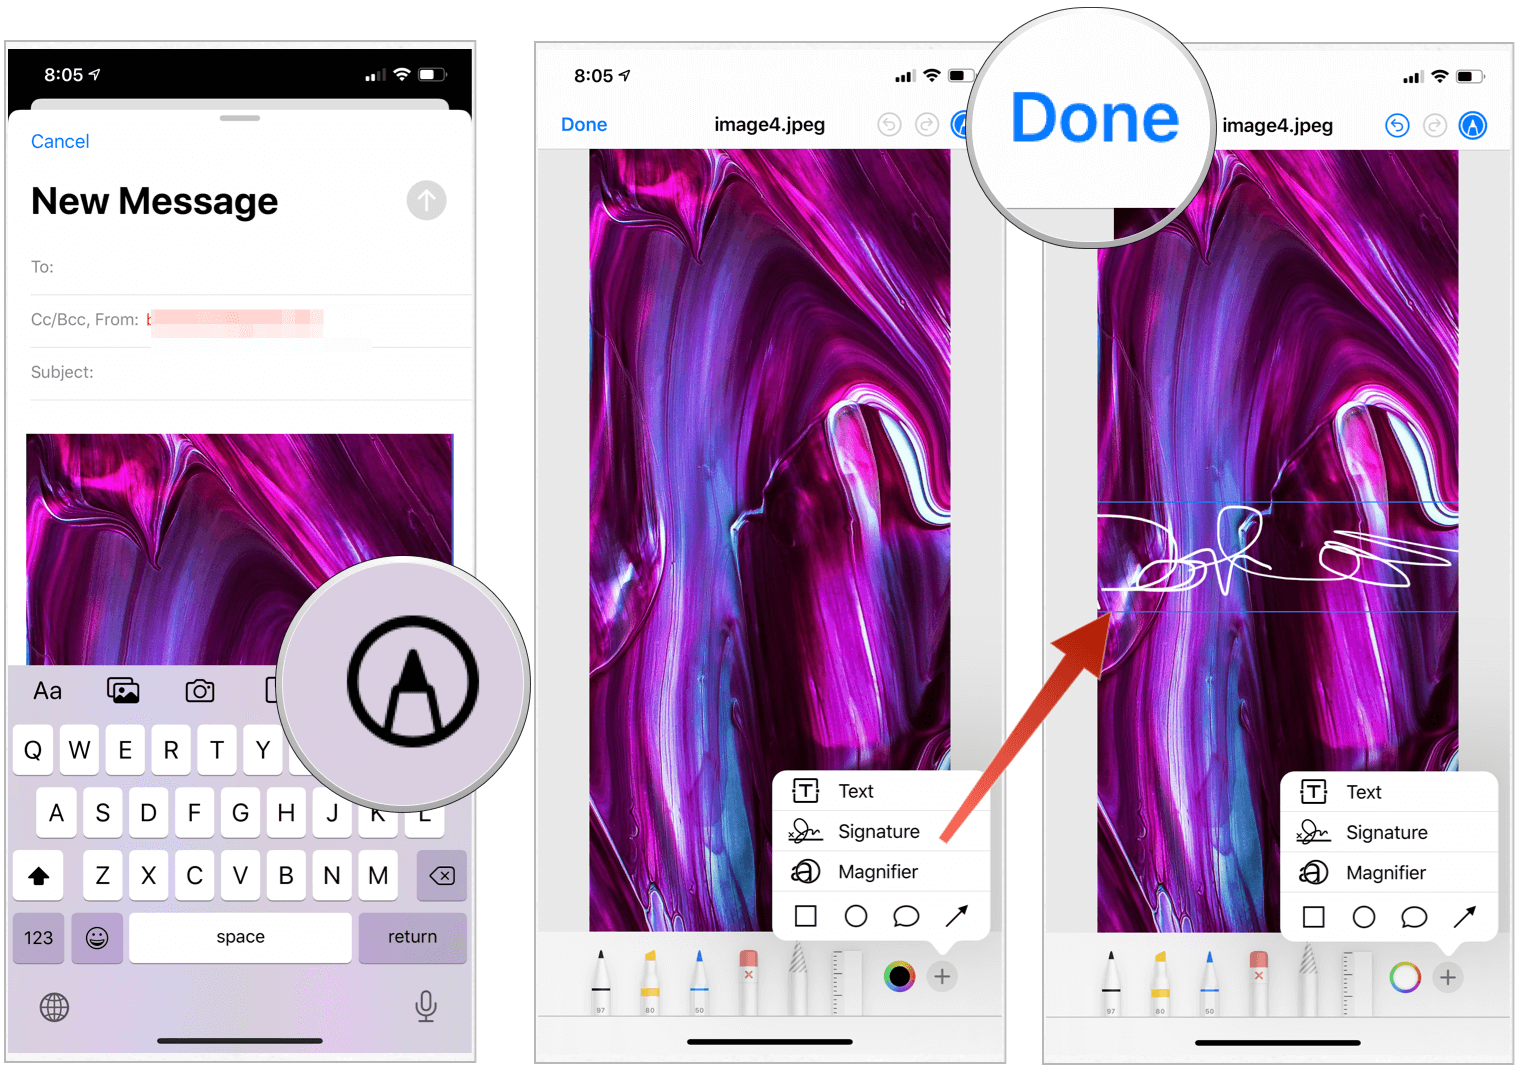
Mail App
Here’s how to perform Markup in the Mail app:
Next:
A Useful Tool
When you need to Markup a file on the fly on your Apple device, use Markup. The tool is easy to use and available across multiple apps. Use the tool to add some vital information or flare to your images or other documents.


![]()
