You need a minimum of one extra drive connected to your Windows 8 system. Meaning your local (C:) drive and another internal or external drive. But for best results, you’ll want to add at least two extra drives. Two drives lets you utilize Mirroring which copies or “mirrors” data on both drives. In the event of a disk failure, you’ll still have all of your backed up files.
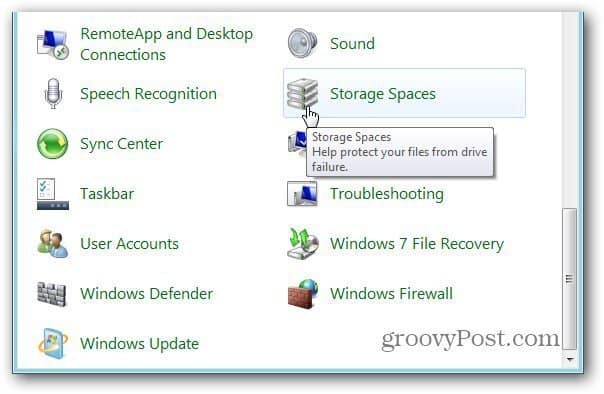
Diagram Credit: Microsoft Here I’m setting up Storage Spaces on a Windows 8 Consumer Preview system and two external drives. A 1 TB Western Digital My Book and a 2 TB Fantom Green Drive. From the Metro Start screen hit the Windows Key + W keyboard shortcut. The Search box displays with Settings highlighted. Type: storage spaces and hit Enter or click the icon on the left side.
Alternately, open Control Panel, switch view to Large Icons and click Storage Spaces.
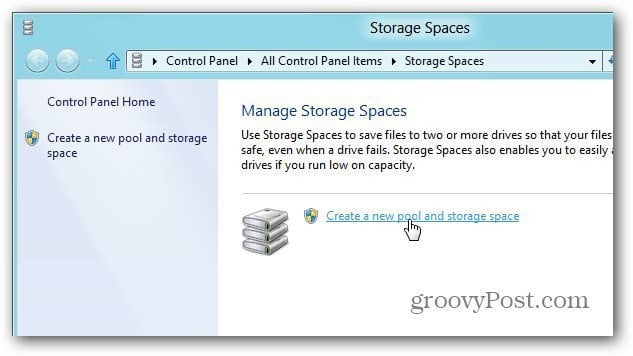
The Storage Spaces window opens. Click Create a New Pool and Storage Space.
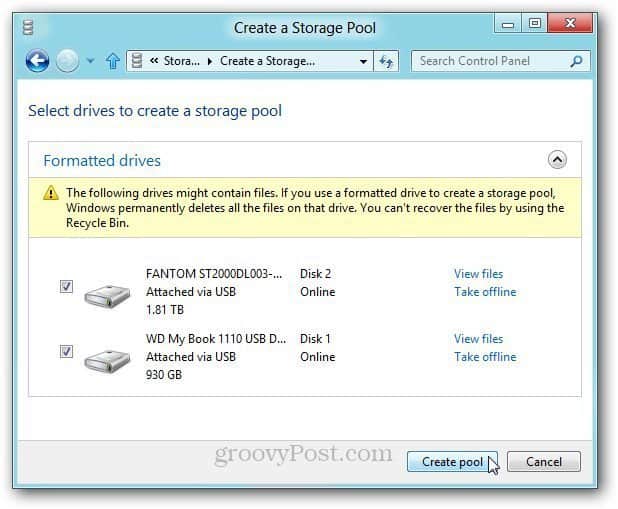
The Create a Storage Pool window opens. It sees the external drives I connected to my system. You’ll see a warning about data being deleted, so make sure you’ve backed up any data you want to save. Click on View Files to see the data that’s on either drive. Or just use a new drive. Check the drives then click Create Pool.
The system prepares the drives to create a Storage Pool.
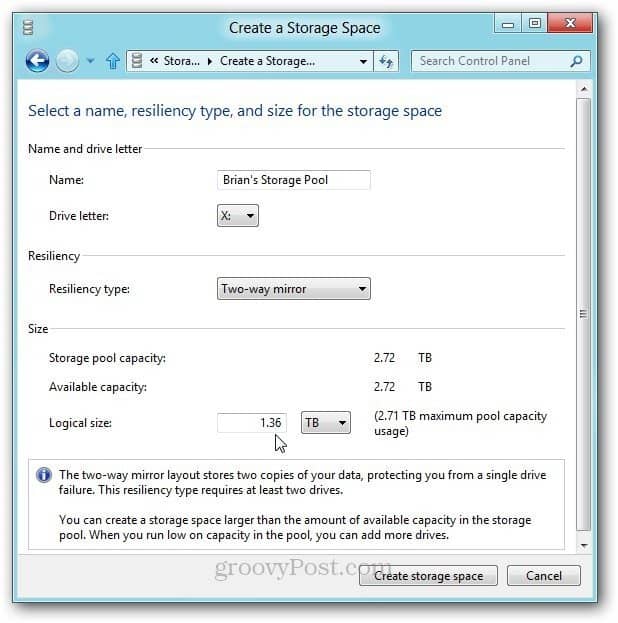
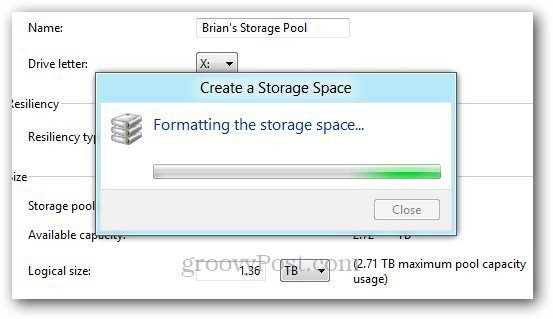
Next give the Storage Pool a Name and Drive Letter. I chose a letter toward the end of the alphabet to avoid conflicts when plugging in other thumb and external drives. Under Resiliency, select Two-way Mirror from the dropdown. This setting stores two copies of your data on each drive. So, if one drive fails, you still have a backup. For Size it splits the total storage in half by default. However, you can make the Logical Size as large as you want. For instance, if I made it 5 TB, when more space is needed, I will get a message to add more storage. Click Create Storage Space.
Windows 8 starts formatting the drives and creating the storage pool.
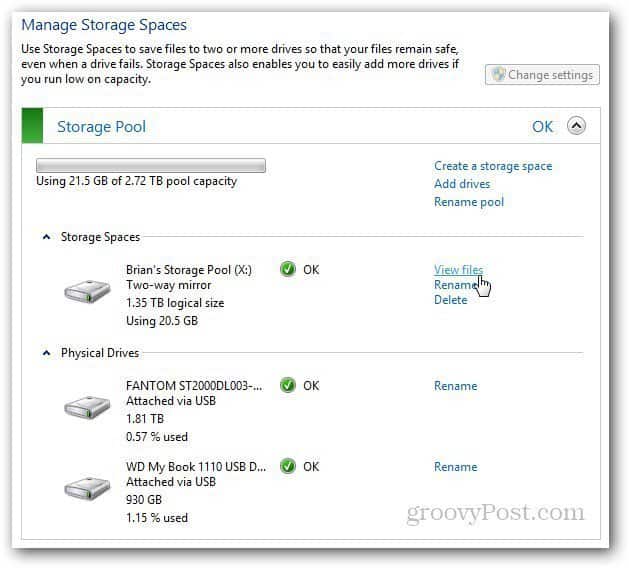
After the Storage Pool is created, it shows in Computer as a single hard disk. The pooled drives will act as one. You can use it just like any other connected drive on your system. You’re also able to use BitLocker or TrueCrypt on the Storage Pool to encrypt your data.
Here I’m moving some files located on my WHS 2011 HP ProLiant Microserver to the Storage Pool using the new Copy feature in Windows 8.
Go into Manage Storage Pool to view files, rename it or rename individual drives in the pool.
If you want to delete a storage pool for any reason, click Delete Pool.
Being a Windows Home Server enthusiast, it makes me wonder if Storage Spaces, along with the HomeGroup feature, could replace the need to have a WHS or Network Attached Storage (NAS) unit on a home network. Since the pool of drives works as a single drive, you an back up your data to it using SyncToy, the Backup utility in Windows or any number of third party backup programs. I’ve just started testing out Storage Spaces. It’s an exciting feature with a lot of possibilities. There’s interesting things you can do via Power Shell commands too. I’ll be going over the more advanced options in subsequent articles. Now you have a basic understanding of how Storage Spaces works and how to set it up for yourself. I have read on MS TechNet sites that you can actually set up your Storage Spaces pool in RAID configuration using PowerShell commands. There is a lot more in this feature than just creating a huge storage pool. I will be testing out more and will be posting more groovy articles on it as I go!
- With those, you can even grow a volume, which is not possible with Storage Pools? + Recovery is probable more simple with Dynamic Disks? (e.g. accidentaly removed files…) – Thin Provisioning not possible – USB disks not possible Comment Name * Email *
Δ Save my name and email and send me emails as new comments are made to this post.


